
Why it’s Important to Control the White Balance Settings on Your Camera
When the white balance is correct in a digital photograph, white will appear white and all colors in the photo will look as they do naturally. If the white balance is not set correctly, your photos will have an unusual color cast across them. A white object will not look white.
Did you know that light can be colored? Not only LED, neon, or fluorescent lights, but natural daylight can have a distinct color cast. This can have a marked effect on the outcome of your photos. White balance in a camera filters the light, so the colors look right.
Before we delve into the details of white balance, it helps to have an understanding of color balance in
Color balance changes the mixture of colors in a photograph, and it’s used for color correction. Photographic image data from your camera’s digital sensor is digitally transformed from their original values or level to new values needed to appropriately reproduce the image. Color correction is essential because the initial image from the camera sensor does not match the human eye, so the camera has to compensate for those differences.
Contents
What is White Balance?
White balance is a setting in your camera that helps you produce a natural-looking coloration in your image. The goal of white balance is to achieve the most accurate colors possible. The color of your subject in a photograph is affected by the type of lighting you’re using. Our eyes and our brain automatically compensate for the differences in light. For example, a green object will always appear green to the naked eye regardless of whether it’s viewed in sunlight, fluorescent, or incandescent light.
The white balance setting on your digital camera controls the color temperature of the light by filtering it. This is done so that any white object will look white, and all the colors in your image will look natural and as they should do.
Digital cameras use white balance to compensate for the difference between what our eyes see and what the cameras record. The white balance setting helps to match the color cast of the main light source illuminating your subject.
The camera will filter the color temperature of the light to achieve a correct white balance. This can be done manually or by setting your camera to the auto white balance setting. The auto white balance setting is best when the ambient light is the same color temperature.
In mixed lighting conditions, things can be more challenging. If you have warm light and a cold color temperature of light affecting the same image, managing the white balance setting on your digital camera becomes more challenging. Also, when you are using non-dedicated external strobes or flash, the auto white balance setting will not be helpful. You will need to set a custom white balance setting to achieve the correct color balance in your photos.
How to Determine and Adjust White Balance Settings?
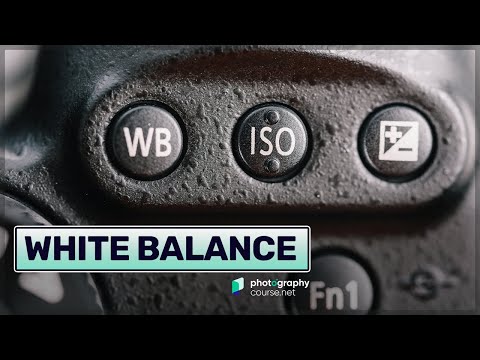
The first step in determining your white balance is to find where you can change and adjust it on your camera. For example, my Canon 6D denotes the white balance by pressing the Q button on the back of the camera. This opens up a menu – where on the third row, the second icon is where you will find the various white balance settings. If you have never touched this, then it will read AWB, which stands for auto white balance.
Using the auto white balance on your digital camera will work very well in most ambient light situations. The main catch comes when there is a mixed lighting condition. This can be from artificial lighting or natural light. When there is more than one light source that affects your composition, and they are of different color temperatures, a choice needs to be made. The auto white balance on your digital camera will not be of much help.
The main drawback of using different white balance settings is that you will inevitably forget to adjust the white balance when encountering different lighting conditions. Setting the camera white balance can be more precise, but only when you are skilled at recognizing the lighting conditions and remember to change the camera’s white balance adjustment.
Using the auto setting for white balance, you don’t have to worry about whether you are taking photos in:
- Direct sunlight
- With an overcast sky
- Under a tungsten bulb or an incandescent bulbs
- With mixed lighting conditions
- Under artificial lighting that has a blue cast or a green tint
- With flash or studio strobe lighting.
White Balance Presets
White balancing can be done by using presets. You can preset the white balance in the camera’s menu system, where you will find a number of different options to help you achieve the perfect white balance. This will help you avoid any unwanted color casts.
White balancing using these settings is easier than using custom white balance settings based on manual control of the Kelvin temperatures.

Auto White Balance Setting
The auto white balance auto-adjusts based on the ambient light the digital camera sees. It automatically adjusts for natural-looking colors. Auto white balance is best used with ambient lighting. Once you start to add flash or strobes, the automatic white balance may not provide the correct results.
Daylight
For outdoor scenes under clear skies in direct sunlight, the color temperature is around 5,200K.
Shade
Used for photos you take in the shade when you are outdoors. The color temperature in the open shade outdoors is about 7000K.
Cloudy
This is for cloudy days and when you have an overcast sky. The light will have quite a cold color temperature of about 6000K.
Tungsten Light
For indoor scenes under old-style incandescent (tungsten), light or more modern warm LED or fluorescent lights with a color temperature of approx. 3200K. As with the fluorescent white balance setting, you need to be careful with the type of light you are photographing in.
How can you be sure if it is tungsten light and not some LED light or another kind of light that is illuminating the room? These settings on digital cameras are now a little redundant as there are many kinds of different light sources used in all kinds of buildings.

White Fluorescent Light
Fluorescent bulbs and tubes come in primarily three different color temperatures. These are cool white, warm white, and daylight. The fluorescent lights’ white balance in digital cameras generally filters out the cool white color cast.
You need to check what type of white balance the fluorescent lights have when you are taking photos indoors with this type of lighting. If you set your white balance setting for fluorescent lights, but they are of the warm or daylight type of output, the colors in your photos will not look correct. White will not look white. For indoor scenes under cool white fluorescent light, approx. 4000K.
Flash
Used with flash
The one catch with white balance and flash or strobe light is that auto white balance may not detect these lights. If they are dedicated to the camera, then there should be communication between the light and the camera. Then the camera will know the appropriate white balance required and should have no problem auto-setting the white balance.

Custom
You adjust the settings manually. This involves dialing in the correct amount of filtration to achieve the desired white balance setting. The Kelvin scale is used to help determine this.
Kelvin is a scale for measuring color temperature. It is used to help set the white balance on your digital camera manually by assigning a Kelvin number to warm, cool, and neutral color temperatures.
Color Temperature
The ability to make your image warmer or cooler by adjusting this setting. You can use these settings to adjust based on the camera’s suggestions. These are helpful to use if you have never experimented or changed your white balance prior to shooting.
For RAW images, you can adjust the white balance in Lightroom during post production. But, changing the white balance before shooting will help you determine what you want your image to look like.
Manually Adjusting White Balance Using the Custom Setting
As we explained above, the white balance can be changed in the camera by scrolling through the preset options. The other option is to manually adjust your white balance by using the custom setting and a gray card.
A gray card is typically used when a mixed lighting situation is present during your session. This may be that you have a mixture of natural light and overhead lighting, in which case this helps to bring the natural and neutral color back to your images.
In order to achieve the colors you want, you start with photographing the gray card. It is important to remember that the card must fill the entire frame, and nothing else can be in the shot. You may have to manually focus in order to achieve this.

Then you navigate to the “custom” setting of white balance, as we discussed. It will guide you to choose an image, in which you select the one you took of your gray card. Press OK, and the white balance will be set. If you change positions or move within the space you are taking photos of; you will need to readjust and photograph the card again.
Also, if the light changes, you’ll need to make another reading and adjust the settings. Say, if the sun is out when you make your first reading and then it disappears behind a cloud. The color temperature of the light changes, so a new reading is required. This makes this method extremely cumbersome and slow to use.
Most photographers prefer not to always use a gray card, but it helps ensure your coloring is correct in certain situations. For more information, read our article on how and why to use a gray card.
Adjusting Color Temperature
Another way to add your own personal white balance preference and color tone to your images is to manually adjust the color temperature, marked as K on the white balance settings.
The K represents the Kelvin value used for measuring color temperature. The temperature starts at 2500K, which makes the image have a blue cast, and ends at 10,000K, resulting in a yellow/orange image. This is often the case when a photo is taken in warm light.

As the number on the scale increases, the Kelvin value temperature goes from blue to a cool blue cast, and from warm yellow to completely yellow – this replicates the temperature slider you would use in Lightroom. Based on your style and vision for the image, you can change the temperature as you see fit.

Saving Your Photos in the RAW File Format
When you have your digital camera set to save your images in the RAW file format, it is much easier to adjust the white balance during post-processing. If you save your images as jpg files, it will not be so easy or effective to make adjustments to the white balance settings in your editing software.
The RAW format retains all the image data your camera records when you take a photograph. The camera throws out much of this detailed information when you have it set to save jpg files. Saving your images as RAW files means you can easily make adjustments to the white balance of your photos when you are editing them.
Conclusion
White balance is essentially the best way to control the color of your images within the camera. Depending on whether you want true, natural colors or want your images to be very cool or warm – you can adjust and change the settings as you see fit.
As with most choices you make when taking digital photographs, getting the settings as good as you can is best. You can edit the white balance successfully in a RAW file most often, but this takes extra time. Making adjustments to the white balance before you take your photos is a good habit to form.
Do you adjust the white balance within your camera or in post editing of your images? Let us know in the comments below.


So video #1 NEVER , ever use the Auto White Balance and vid #2 The auto white balance is fantastic in a wide range of lighting conditions…..
do all canon cameras have kelvin white balance modes?
Most of the DSLR’s from Canon has it, specially the pro models such as 5D Mark iii.