
Do you worry about your photos being copied and used illegally by others when you post them online? Do you want to make sure everyone knows you’re responsible for your wonderful images? Then you need to learn how to make a watermark for your photos in Photoshop.
Watermarking your photos can help protect them from people using them without your permission. It can also provide people a way to contact you if they wish to purchase your images.
Learning to make a watermark in Photoshop is easy enough. Knowing what to use to help protect your images can be more challenging when you’re considering creating a watermark.
What Can You Use To Watermark Your Images?
You can use text, an image (such as a logo), or a combination of both to watermark your images. I don’t think there is one style of watermark that will suit everyone. You must decide for yourself.
Related Article: Adding Watermarks in Lightroom.
The main things to consider when designing watermarks are:
- Why do you want to watermark your images?
- Will the design you use be too distracting on your images?
- How will your logo look as a watermark?
- Do you want to include a website or email address in your watermark?
Once you answer these questions you’ll be well on your way to creating a practical and attractive watermark you can use.
Why Do You Want to Watermark Your Images?
Many photographers like to watermark their photos to discourage illegal usage. It’s very common for people to see an image online, copy it, and paste it into their social media or website without first seeking permission.
It would be impossible to prevent this from happening to any images online. Adding a watermark is one way to help prevent people from taking your photos and using them. If a photograph is watermarked it is less likely to be copied and used without permission.
Some photographers may not be so concerned about copyright infringement. It is very difficult to fully protect against it these days. Adding a watermark that identifies your images as belonging to your provides an avenue for people to contact. This is helpful is they wish to seek permission to use your photos or to purchase them.

Will the Design You Use Be Distracting on Your Images?
Adding a watermark can be a distraction on an image. You must decide how intrusive you want your watermark to be. This is problematic because to be a practical deterrent to people who might steal your photos, the watermark you add needs to be quite visible.
No photographer likes to see their best work defaced by large logos or bold font faces. These types of things ruin how a good photo looks.
Many stock photo agencies are aggressive in how they watermark images on their websites.

You can notice when they are used by someone who has not paid as they have the site’s watermarks all over them.
Using a tasteful design that is not intrusive will communicate to anyone who sees your photos who they belong to. This is often enough to deter people from using them without permission.
How you position your watermark and blend it with your photos will determine how distracting it is.
How Will Your Logo Look as a Watermark?
Maybe you’ve already created a logo for yourself in Photoshop. You now must consider how it will look if you use it to watermark your images.
A simple, strong logo can often be used to create a watermark. I logo that’s complicated or too colorful may not work so well. If you want to add a watermark discretely, then you’ll need to keep it small. You’ll need to think about how good your logo will look when it is reproduced at a small size.

Do You Want to Include a Website or Email Address in Your Watermark?
When making a watermark in Photoshop, including a website or email address will provide some way for people to contact you. If you want to sell your photos or do commission work, this is another form of marketing.
Adding a © copyright symbol and an email or website address can be a very effective way to create a watermark. When people see an image with this type of watermark they are made aware that the image has rights reserved. Only using a logo watermark this information is not so clearly conveyed.
How to Make a Watermark in Photoshop
Watermark creating using only text is the simplest method to use. Adding an image, such as your logo, is another method. You can use both methods on an image by image basis, or you can create a custom brush to add a watermark in Photoshop and use it as often as you like. Let me take you through each process step by step.
Adding a Text Watermark to Your Images in Photoshop
1. Choose a Photo to Watermark
With an image open, add a new layer. To do this hold down Control + J on a PC or Cmd + J on a Mac.

2. Position Your Watermark Text
Next, select the text tool.
Click and drag where you want to place your text watermark. You can alter the size, so an approximation is good for now.
3. Add a Copyright Symbol ©
Add the text you want to use as your watermark. If you want to include the copyright symbol © do this by holding down the Alt key on a PC or the Option key if you’re using a Mac. As you are holding down the key type in on your number pad 0 1 6 9 and the © will appear.
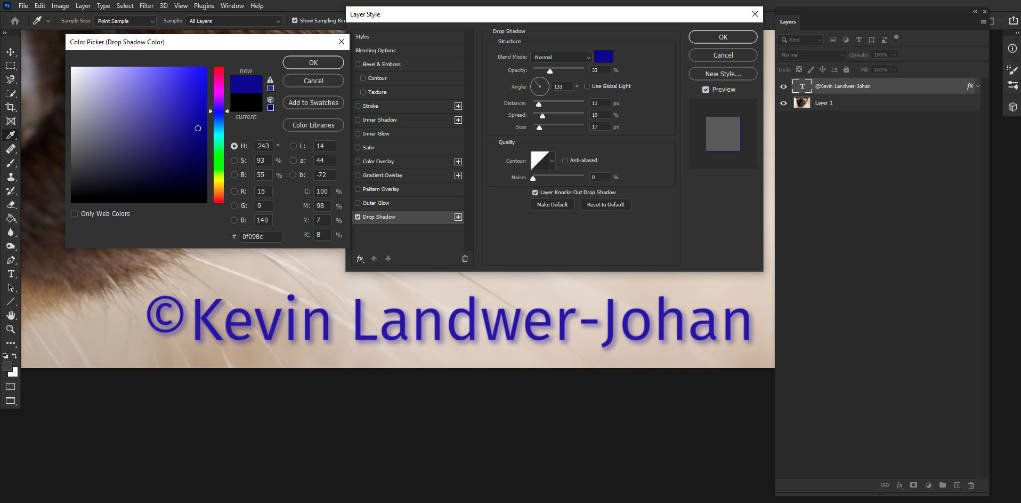
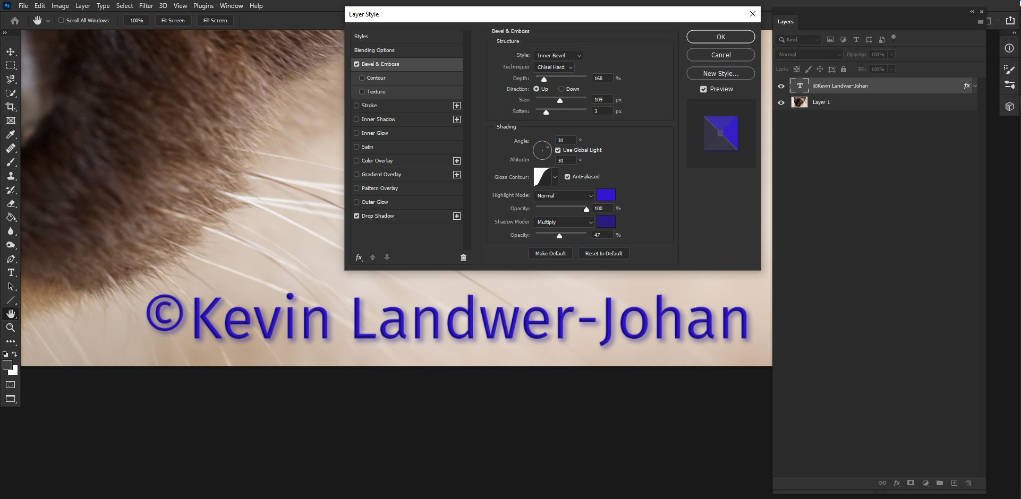
4. Choose a Font, Size, and Color
Now you can choose the font, size, and color for your text. You also have many options in Photoshop to customize your text. You can add a drop shadow and also use the bevel and emboss options to create a watermark with a three-dimensional look.
Adding a Logo Watermark to Your Images in Photoshop
1. Create a New Layer
Make a new layer to place your logo watermark on.
2. Select and Place Your Logo
Locate your logo or image you want to use in your computer’s file system. Then drag and drop it onto the new layer you have created.
3. Resize and Position Your Watermark Logo
You will have to resize your logo and position it where you want it. Use Control + T on a PC or Cmd + T on a Mac to activate the Transform tool. This will add a bounding box with handles around your logo. Click and drag a handle to resize your logo.
A logo can often look best if it does not include a background. If you want this clear cut look you’ll need to select a TIFF or a PNG file type with a transparent background layer.
4. Stylize Your Logo
Depending on your logo, you can also add effects as you can with text. These can include an outline, a glow, or any of the other options. To add these click on the fx icon at the bottom of the Layers panel.
Before you save your image, scroll through the blend mode options to see if altering this will enhance the look of the logo you are adding.
Watermark Creation Using a Custom Brush in Photoshop
If you want to add the same exact watermark in Photoshop many times, using a custom brush is an easy option.
1. Choose a Watermark
First, you’ll need to make sure you have a watermark that you are happy with. Don’t make it too small. It’s easier to decrease the size rather than increase it and retain the image quality.
2. Create a New Photoshop Document
Then, create a new document in Photoshop that’s the same size as the file you’ll use for your watermark. Give this a white background.
3. Add Your Logo
If you’re using a logo for your watermark, drag and drop it onto a new layer in your document. Create a new layer and add any text you want. Here I have used a PNG file and added text with the copyright symbol.

4. Create A Preset Brush
Next, go to Edit in the top menu and select ‘Define Brush Preset’ from the drop-down menu. Name your custom brush and you are then ready to use it as a watermark in Photoshop.

5. Apply Your Watermark Preset Brush
To apply the brush you have created, click on the Brush tool and then select Brushes from the icon menu on the right of your screen. Here you’ll see the watermark custom brush you have created. Click on it and hover your mouse pointer over the image to position it. Click once to apply the watermark to your image. You can add it as many times as you like.
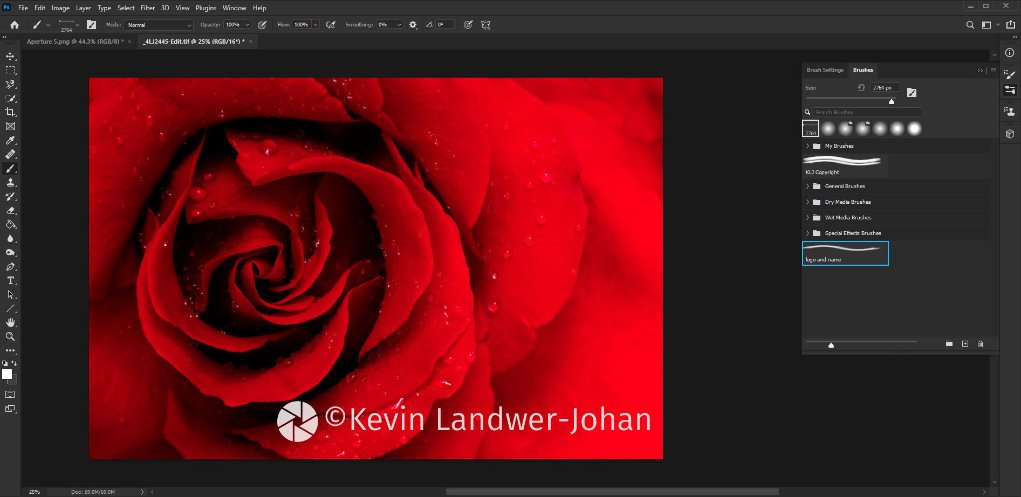
Now you are free to adjust the size and opacity, along with the blend mode if you wish to.
This is a very easy way to apply your watermark to as many of your photos as you wish. By designing more than one watermark preset brush you can further customize how you leave your mark on your photos. You might like a different watermark for different styles of photo.
Conclusion
Adding a watermark in Photoshop is easy to do. Deciding whether to use text, a logo or a combination of both is more challenging. How you place your watermark is very important.
A poorly designed and placed watermark detracts from a photo. Be careful to design your watermarks well and apply them properly in Photoshop. How you position your watermark is important. You can choose to be consistent and always position them in the same place on every image. Or you can customize how you place them and what size you make them so they fit best with each photo.
If you’re including a website address or email, make sure it’s a permanent one. It’s no good adding a web address if in a few years that URL ceases to exist. Adding web or email info on your watermarks makes them a very practical way for people who see your images to be able to contact you. This will help people identify your photos as belonging to you and may provide you with contacts for people who are interested in your work.
Experiment with various combinations of text and graphics. I’m sure you’ll come up with some attractive watermarks that will look great on your photos.


