
Compositing images in Photoshop can be quite simple or pretty complex. You can choose the level of complexity depending on the final result you want to achieve. To create composite images you need to use a program like Adobe Photoshop that has options for layering photos. Adobe Lightroom does not have any options to create multiple image layers, so you can’t use it for blending two images.
Starting with two or more images that are taken using lenses with the same or similar focal lengths will help. This will make sure your blend looks more natural. Lighting of the images is also important to consider. Picking images with comparable light will mean your blend looks better. As you will see later in this Photoshop tutorial, it is possible to tweak the lighting to get it looking good in both images you blend.
Contents
- Methods for Blending Your Images in Photoshop
- The Simplest Method of Blending Two Images in Photoshop
- A More Complex Method of Compositing in Photoshop
- Step #1: Create a Document with Images
- Step #2: Remove Unwanted Elements from the Top Layer
- Step #3: Create a Black and White Adjustment Layer
- Step #4: Adjust Luminosity Levels
- Step #5: Match the Saturation of Both Layers
- Step #6: Adjust the Saturation Level in the Top Layer
- Step #7: Blend the Look of the Colors
- Step #8: Blur the Background to Match the Foreground Image
- Conclusion
Methods for Blending Your Images in Photoshop
Blending images in Photoshop you have the potential to use blending modes to create endless styles. When you start knowing what you want to achieve, the process to blend images in Photoshop will be more streamlined.
There is always more than one way to do just about everything in Photoshop. You may want a simple blend. This can be done by choosing a blend mode or adjusting the layer opacity of one of your images. However, this will produce limited results.
If you have time and want to create two images blending so they look natural, take care to pay attention to more than blend modes and layer opacity. In this article, I’m showing you one simple way to blend in Photoshop and one that’s much more complex. It takes time to blend images well so the blending looks realistic.
If you are already used to using Photoshop you’ll know how much you can achieve with it when you have time. To blend two or more images well takes time. How much time depends a lot on how similar the images you choose to work with are. When the light and color in the images match it is much easier to create a realistic blend.
Blending two or more images together with very different lighting and color is tough. It’s also challenging to blend photos taken with very different focal-length lenses. If you attempt to blend one photo taken with a 24mm lens and one taken with a 120mm lens, your blending will not result in a natural-looking composition.

The Simplest Method of Blending Two Images in Photoshop
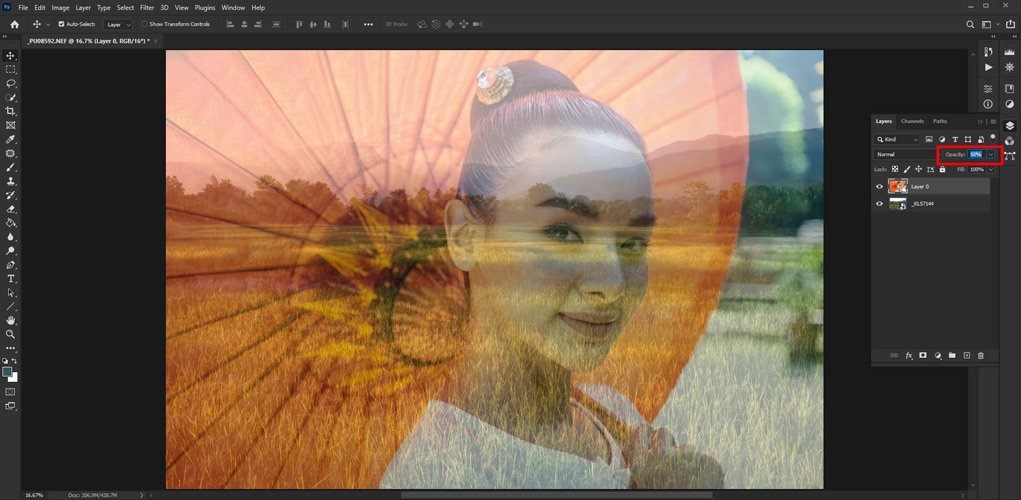
Open an image to blend in Photoshop you will use as your background. Then drag the second image you want to blend onto it. You now have two layers. One with each image on it.
With the top layer selected, adjust the layer Opacity level so the two images blend to look the way you want them to. You can also experiment with the blend modes. Changing the blend mode you can create some surreal-looking photoshop mixing.
Sometimes this method is sufficient. It’s a very quick and easy way to blend two images in Photoshop.
If you prefer a more realistic style, using this method to blend photos will not be enough for you. You can’t rely on blend mode adjustments to create natural-looking images. Blend modes are not really designed for this.
Blend modes are very powerful tools when you use them well. But blend modes don’t really cut it when you want to blend two images for realistic results in Photoshop. You’ll need to work more with tools like layer masks and the brush tool to get the best-looking blend.
A More Complex Method of Compositing in Photoshop
Here is an abbreviated preview of the steps to blend in a more complex manner.
- Create a Document with Images
Open a new document in Photoshop and add the images to it that you wish to blend.
- Remove Unwanted Elements from the Top Layer
Select and remove unwanted elements from the top layer. It might be the whole background or smaller things.
- Create a Black and White Adjustment Layer
This will help you balance the luminosity levels of both images.
- Adjust Luminosity Levels
Getting the luminosity levels as close as possible will mean both your images look natural together when you blend them.
- Match the Saturation of Both Layers
Match saturation levels to get a realistic looking blend.
- Adjust the Saturation Level in the Top Layer
Create a balance in the saturation levels.
- Blend the Look of the Colors
Getting the blending of the colors right will help ensure the images look right together.
Here is a more complex method you can use when you want more control of mixing Photoshop layers together.
Step #1: Create a Document with Images
Open a new Photoshop document. Drag and drop the two images you will use to blend. Make the background image the bottom layer.
Step #2: Remove Unwanted Elements from the Top Layer
Use the Quick Selection tool or your preferred brush tool to select the parts of the top image you want to erase. Here I have used quick select to choose only the background of my top image in the layers panel.
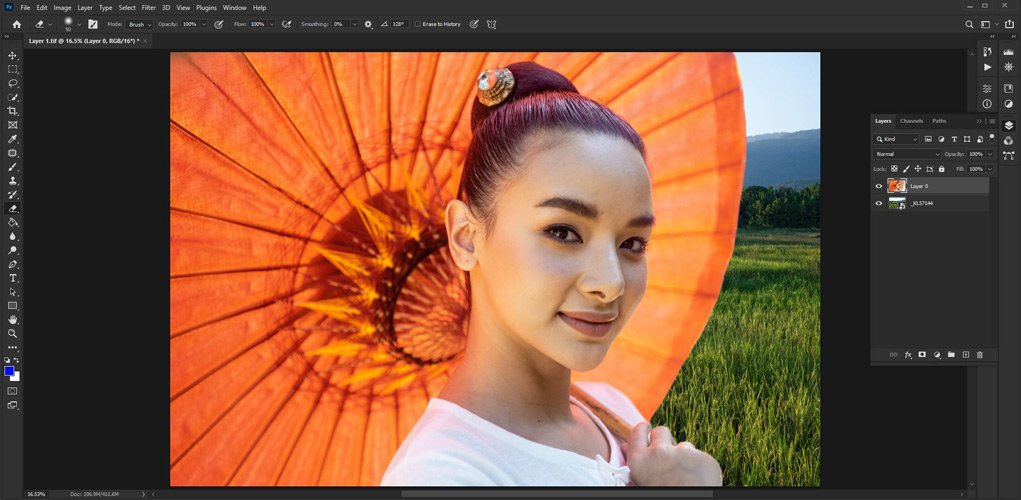
Delete the unwanted section of the top image. Then refine the selection so the edge looks good. You can do this by feathering the edge or using the erase brush tool or the clone tool.
An alternative method for this step is to create a layer mask. Then use the brush tool, with the color set to black, to paint out the areas you do not want to keep.
In this step, you can also move the layers. I have expanded the width of my canvas and dragged the background layer to see more of it. I also cropped the left side of my top layer to reduce the size of the parasol.
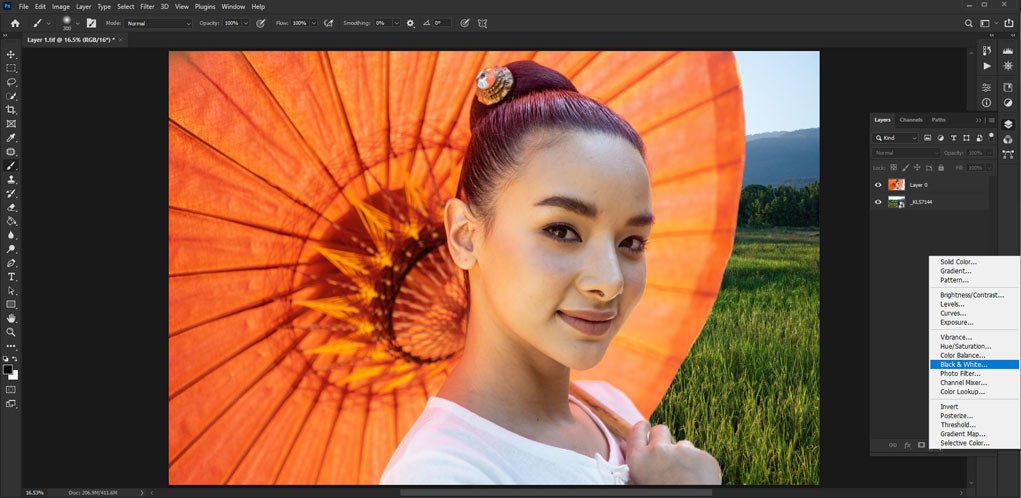
Step #3: Create a Black and White Adjustment Layer
Select the bottom layer. At the bottom of your layers panel, click the adjustment layer icon and choose Black and White. This will help you see where the luminosity differences are in the two images. If these values are too different the blending will not look good.
Name the new layer Luminosity or something that helps you keep track of it. You will be creating more layers so it is good to be well organized.
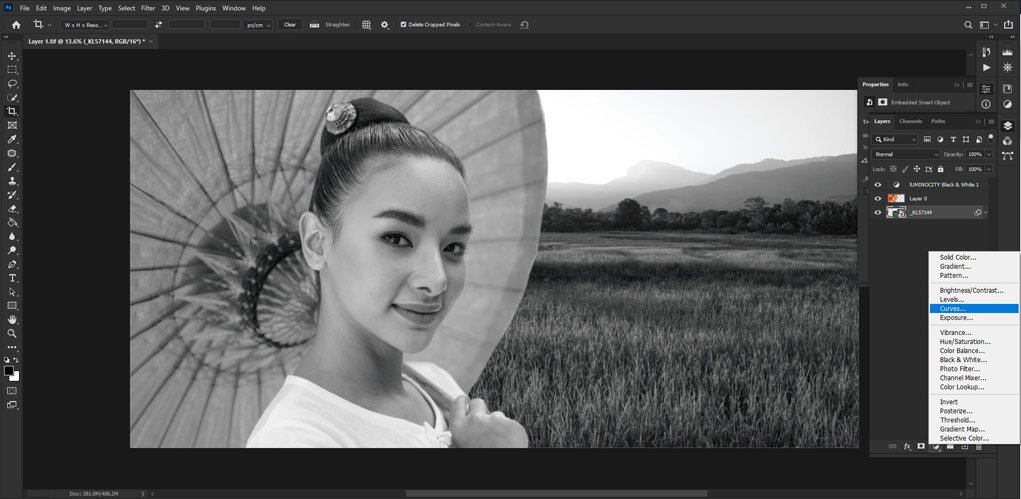
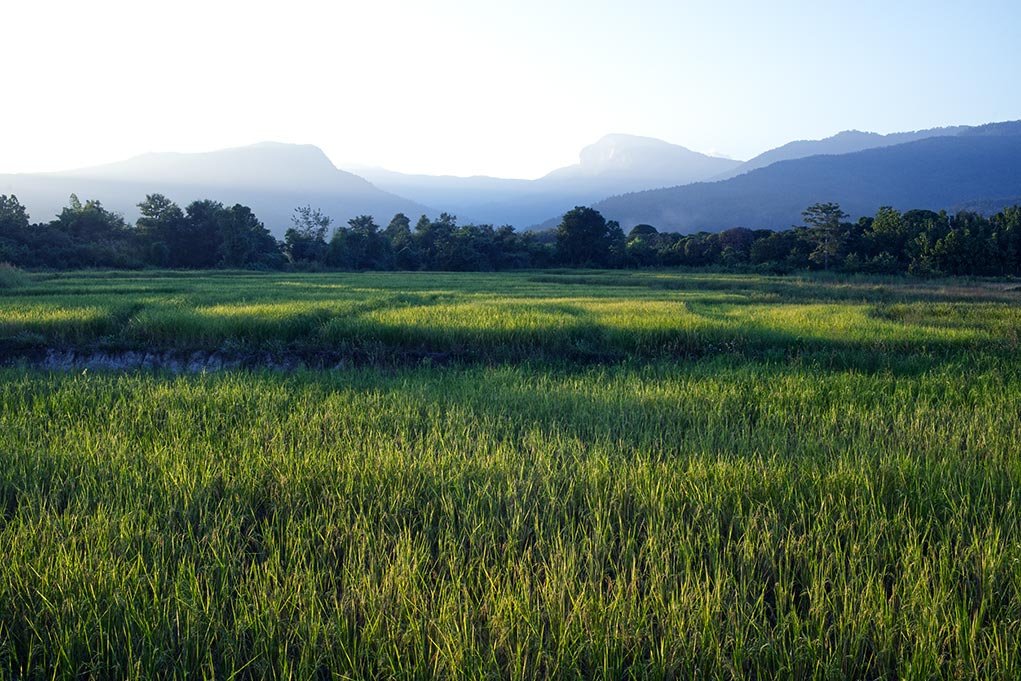
Delete the mask from this layer. Now you can see if the luminosity levels are different in the two layers. In my images, the background layer is darker, except for the sky.
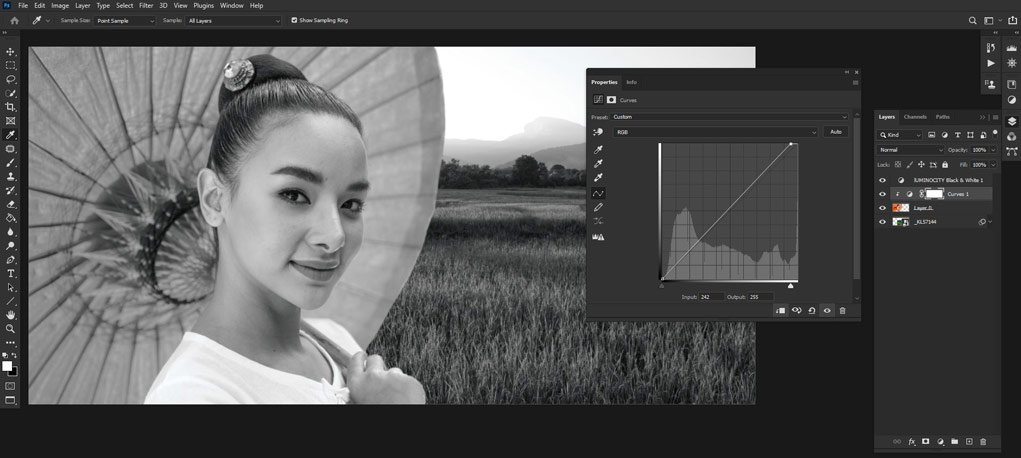
To help you see how different the luminosity is between the two layers, create a new Curves Adjustment Layer. Then click and drag the black point while holding down the Alt key, (or the Option key if you’re using a Mac). The layer will turn white and as you drag the black point to the right it will reveal the darkest parts of the image.
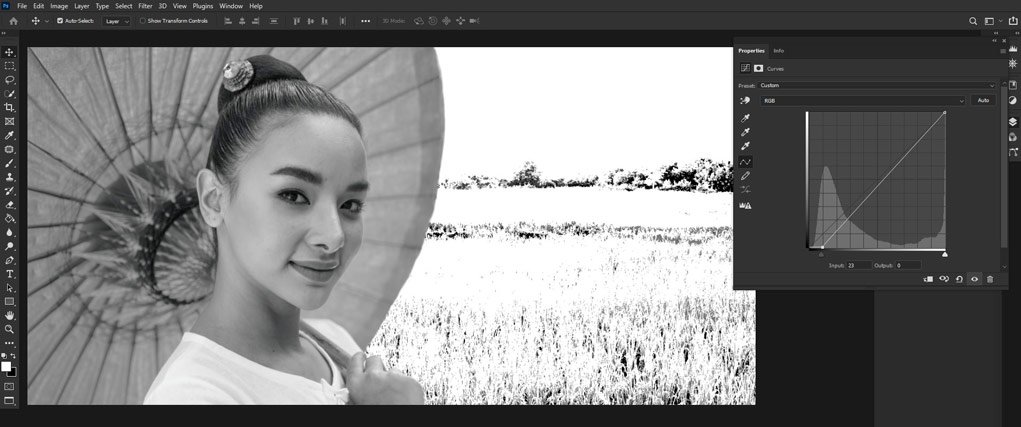
Then do the same with the white point to the right side of the curve. Alt/Option click and drag it to the left. This will reveal where the brightest areas of this image are.
Now delete this curves layer as you no longer need it.
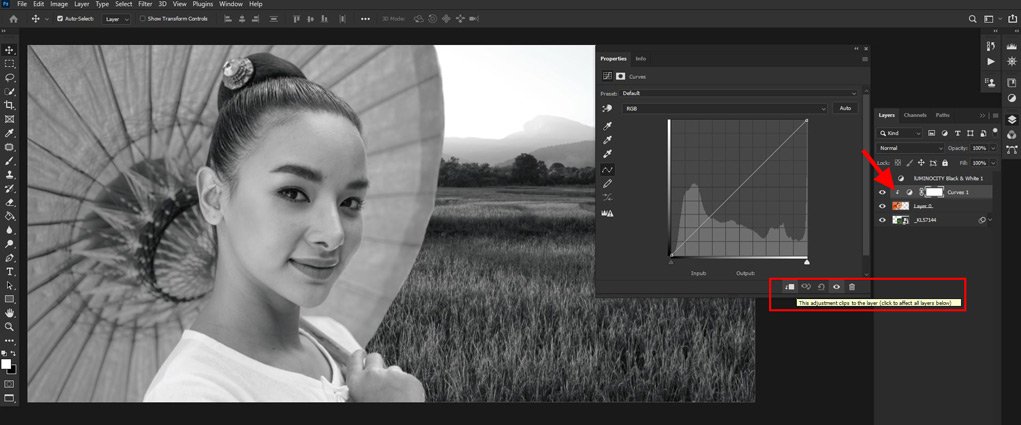
Now repeat this with the top layer. Select the layer. Create a new curves adjustment layer. Then click the square icon with the bent arrow so the curves adjustment only affects the layer directly below it and not the bottom layer. Alt/Option click and drag the black and then the white points to reveal the darkest and lightest areas on the top layer.
Step #4: Adjust Luminosity Levels
Select the eyedropper tool and click on the darkest area of the image in the lower layer. Then click on the color icon to bring up the color picker dialog box. Check the percentage of black. 0 is true black. The darkest part of my background layer image is 6%.
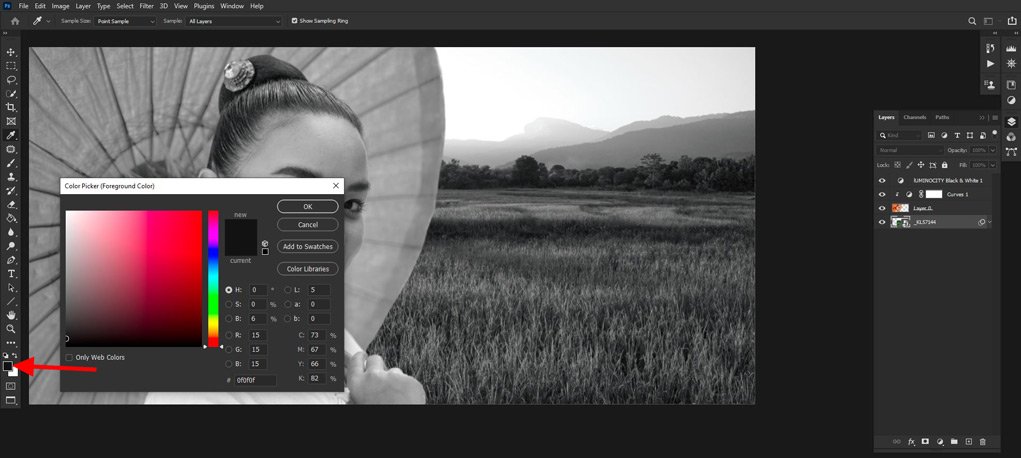
Then use the same technique to check the level of black in the darkest area of the top layer image. In my image, it is 4%. This little difference is negligible so I won’t need to make any adjustment. If there’s a significant difference in the black level, adjust the curves layer that’s linked to your top image. You want it to be close to the black level in the lower layer image.
Then repeat this technique so the white levels match. The sky in my background image was 100% white. The woman’s blouse was 90%. I adjusted it to match by dragging the white point of the curve a little to the left.
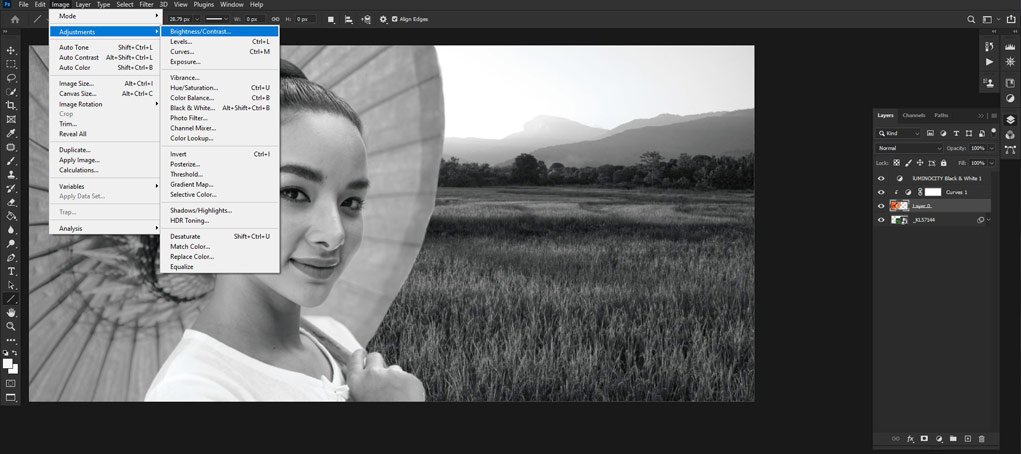
If there’s still too much difference in the contrast levels between the two images you need to adjust it. Go to Image in the top menu options bar. Then select Adjustments>Brightness/Contrast. Use the sliders so your top image matches the contrast level of the bottom image.
Now you have the luminosity levels of both images looking good.
Change the blend mode of this curves layer to Luminosity. If you don’t change the blend mode, the changes you made will affect too much of the image. At this stage you only want this layer mask to affect the luminosity.
Step #5: Match the Saturation of Both Layers
You now need to check the saturation levels of both layers and adjust them if there’s too much difference between them.
You can skip creating the next layer mask and adjust the saturation without this layer if you’re used to blending in Photoshop.
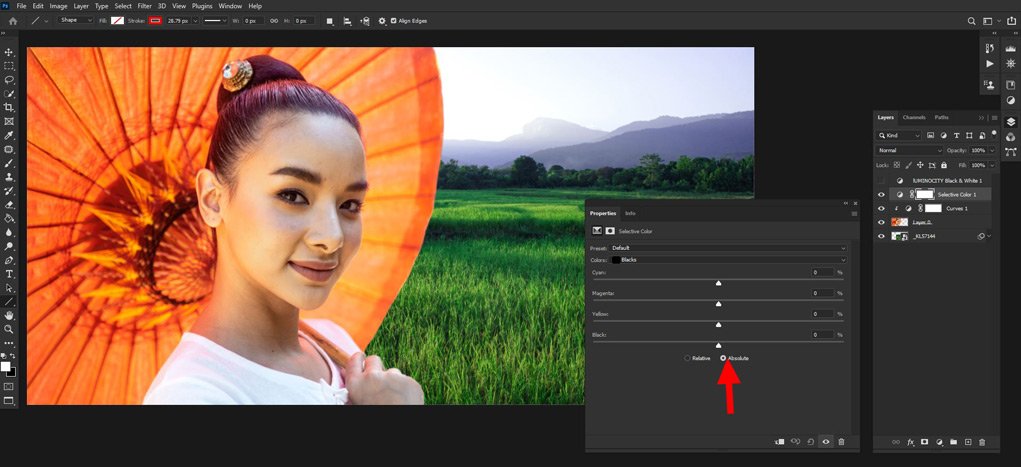
In the Layers Panel, create a new Selective Color adjustment layer with a layer mask above the Luminosity curves layer. Go through each color in the drop-down menu. Select it and drag the Blacks slider all the way to the left.
With the Whites, Neutrals, and Blacks in the same panel, drag the Blacks level all the way to the right. This will leave you with an image that looks like a black and white film negative.
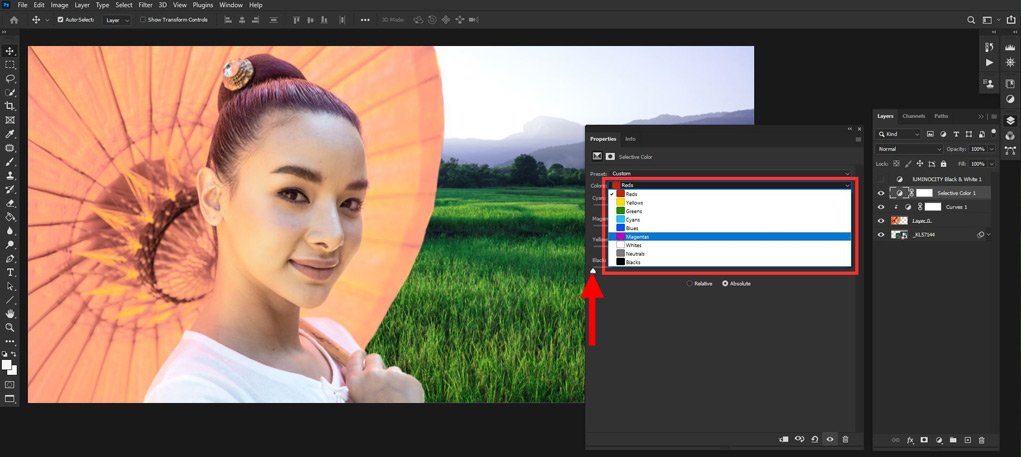
Now the saturated areas will appear light and the de-saturated areas look dark.
Step #6: Adjust the Saturation Level in the Top Layer
Next, go to the Layers Panel and click the adjustment layers icon, and select Hue/Saturation. This creates a new layer mask you can use to balance the saturation of your two images. Clip the layer mask to the layer below and name it something like Saturation Adjustment. Also change the blend mode to Saturation so the layer mask will only affect that and nothing else.
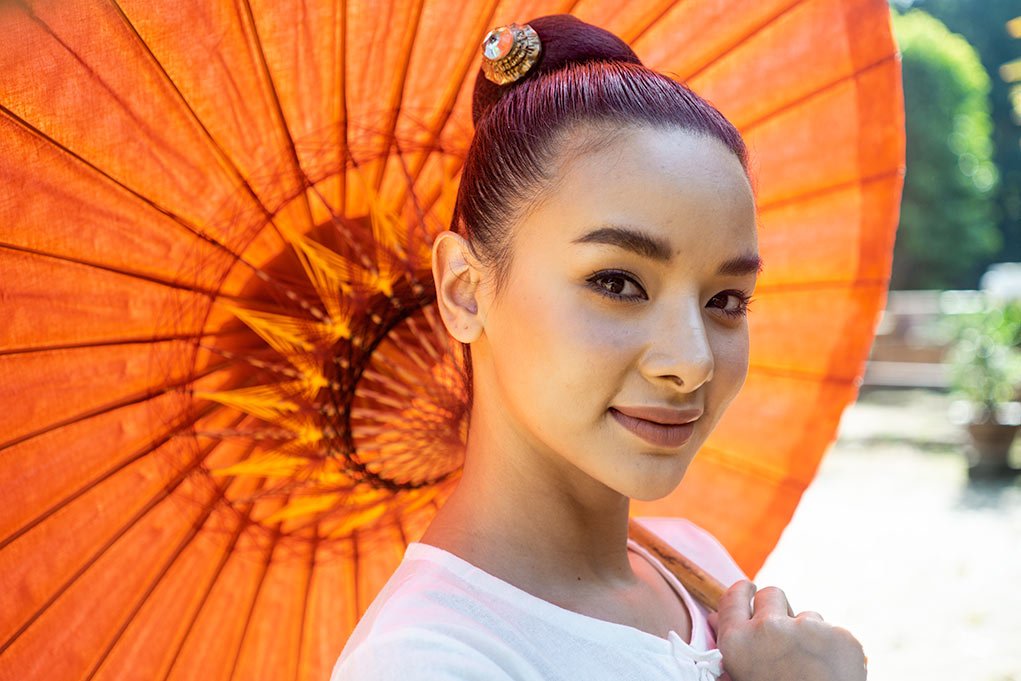
Increase or decrease the saturation so the top layer matches the background layer. In my top image, the parasol is highly saturated and the woman’s skin is not. In this situation, I need to select the color of the parasol only.
To do this, click on the hand icon that is above to the left of the sliders. Then click on the area where you want to selectively adjust the saturation. Photoshop will automatically select the most prominent color in that part of the image. Drag left or right to de-saturate or saturate that color.
I have only slightly reduced the saturation in the red of the parasol because her skin also contains a lot of red. When it’s desaturated too much she looks ill. To help you see the actual levels of saturation you can turn off the Selective Color layer mask in the layers panel.
Step #7: Blend the Look of the Colors
You want to make sure you blend colors in both images look natural together. In the Layers Panel, create a new Solid Color adjustment layer. Make it a mid-gray.
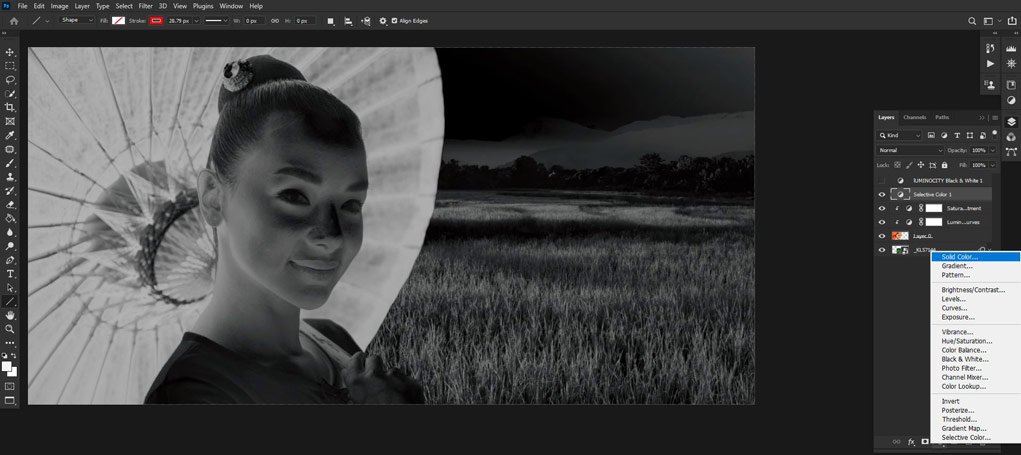
Delete the layer mask and make the blend mode Luminosity. This will make sure it’s easier to see the adjustments you will make to the colors.
Next, in the layers panel again, make a new Selective Color adjustment layer. Clip it to the layer below and name it something like Color Adjustment.
I created this layer mask above my background layer. This is because I’d prefer to warm up the colors of this image rather than make the woman look more green like the rice fields.
This step may also be easier without using the solid color layer if you are an experienced Photoshop user.
Choose each of the Blacks, Neutrals, and Whites and use the sliders to adjust the blend of the colors. These will add or subtract color from the cark, mid-tone, and light parts of your image. Experiment with the sliders and blending colors until you are satisfied the colors in both images look natural.
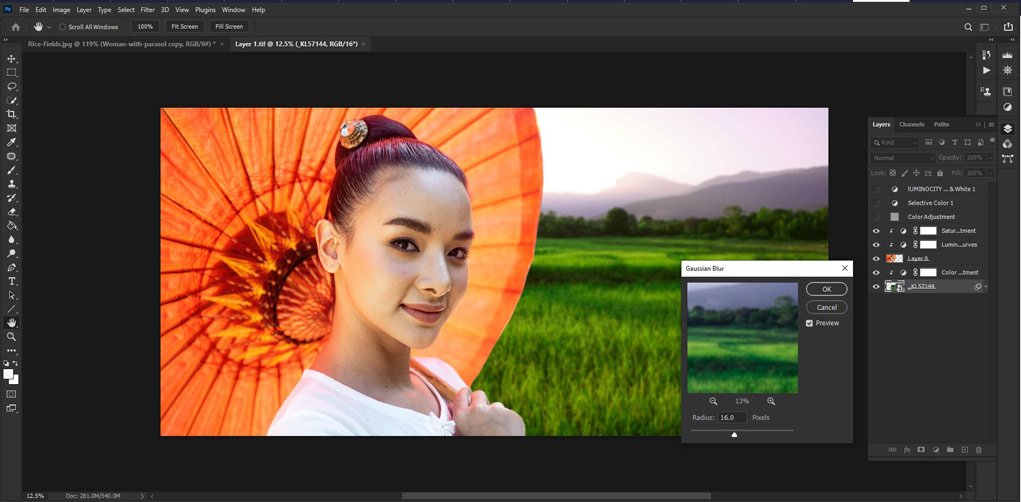
Step #8: Blur the Background to Match the Foreground Image
You many need to blur your background image so it matches the amount of depth of field in your foreground one. The woman’s face is sharp but her parasol is not. The rice is further away but it is sharp. This is unnatural, so I have applied a Gaussian blur to the background layer.
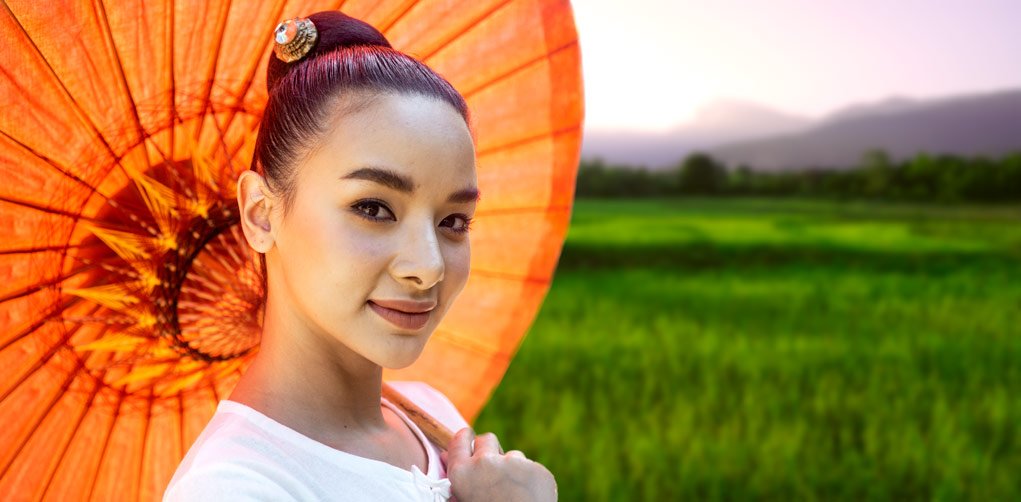
Conclusion
Blending colors, saturation, and luminosity in Photoshop well will make two or more images look like they belong together. If the blending is poor, it may not be obvious to everyone what’s wrong with the image, but it just won’t look right.
Take your time to experiment with aspects of the layer masks and blend modes in Photoshop. These can also help you tweak your images so they look right. Choosing to adjust the layer opacity also gives you another level of control.
Make sure on each adjustment layer you have the appropriate blend modes selected. Blend modes on layers affect different aspects of that layer. If you use the wrong blend mode more of the image than needs to be is affected.
As with any complex set of actions you choose to make in Photoshop, there is always more than one way to achieve the end goal. Starting with a tutorial such as this is a good beginning. Use what you’ve learned about blend modes, layer masks, the brush tool, and other aspects of blending in Photoshop to help you build your own workflow. You may find new ways to blend your images.
Whatever style you are aiming at when blending images in Photoshop, take your time and choose to stop when you have created the look you want.


