
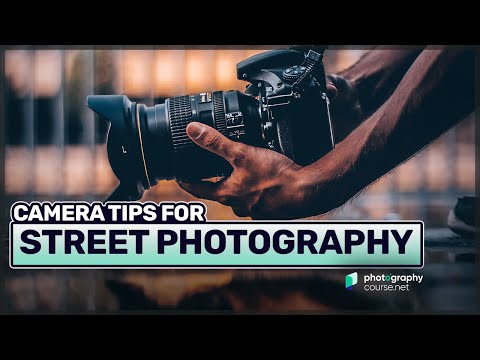
In street photography, fast-paced action is the norm. You might not be dodging literal bullets like some others, but excellent awareness and reaction speeds are still critical.
In order to turn out great shots, you need to be able to adapt. You need to have an intuitive grasp of which kind of setup works well in what kind of environment.
Learning that intuition can be tricky, but it’s definitely not impossible. All the great masters of street photography started out somewhere, after all!
The basis for any practical intuition is theoretical understanding. That theory of street photography will be today’s topic.
In the following guide, we are going to introduce you to the technical background you need to master this genre.
We will look at all the skills and practical knowledge you need in order to succeed in street photography, including the most important camera settings for common shooting situations.
Read on for the whole take!
The Exposure Triangle for Street Photographers

Let’s start with the basics. No matter your gear, level of expertise, or discipline, all photographers have to deal with the three elements of the exposure triangle to be able to turn out good shots.
For street photography, it’s no different. Before you head on to more arcane details like depth-of-field calculations, program automation, and advanced focus techniques (all of which we are going to cover, no worries), you do need to be familiar with aperture, shutter speed, and ISO settings.
Aperture Settings for Street Photography

As you might already know, the aperture of your camera serves two purposes.
Using Aperture to Change Exposure
First, the aperture decreases or increases the amount of light let in at the moment of exposure. Large apertures are commonly used in low-light photography for that reason. “Stopping down” by selecting a smaller lens opening is equally useful when you are shooting in a brightly-lit environment.
Using Aperture to Change Depth of Field
The aperture setting also has a second function: it determines the depth of field of your shot.
Depth of field is an often-used buzzword, but a poorly understood concept among many. This even includes street photographers whose work greatly relies on mastering it.
So, what is the depth of field (DOF)? In simple words, imagine your focus point not as a literal, single coordinate but rather as a field, like an imaginary cloud within which all subjects are in focus.
DOF describes the size or extent of this field.
A high depth of field means a large portion of your shot is in focus. In some particular cases, the depth of field can be infinite, so everything is in focus!
Conversely, a small DOF means that only some elements of your shot will look sharp.
This might sound counterintuitive at first, but know that a large aperture like f/2 has a much smaller depth of field than a small aperture like f/22. Within street photography, a large DOF has long been the majority’s preference.
That doesn’t mean that you can’t or shouldn’t shoot on larger apertures in the street – sometimes, it might be the best option for the moment.
Nevertheless, a large DOF brings with it a degree of flexibility that can make or break some heat-of-the-moment shots. We will further explore why this is later on when we talk about focus. But for now, note down that smaller apertures are generally preferable in street photography contexts.
Shutter Speed in Street Photography

Shutter speed, like aperture, also affects the exposure of your photograph in two ways at once. Again like the aperture, shutter speed directly adjusts the exposure level by letting in more or less light.
However, the shutter setting of your camera also has an effect on the perception of motion within your frame. Longer exposures will merge moving subjects, creating a blur.
Very short exposures can appear to “snap” or freeze motion into place, with little or no blurriness.
Both high and low shutter speeds can be used creatively to shoot street photography with fascinating, moving results.
Used correctly, a high shutter speed, such as 1/250th of a second or above, can make for extremely sharp candid street photography. This is often preferred for street portraits and shots where a high level of detail rendition is important.
However, a lower shutter speed can be equally evocative.

By blending together movement, a low shutter speed can create timelapse-like effects that are not just eye-catching, but can also meaningfully frame your subject in a way that is very difficult, if not impossible, to pull off otherwise.
ISO Explained for Street Photographers
The last element of the exposure triangle is ISO, or film speed. Like its two siblings, it determines how much light reaches your camera’s sensor (or film).
ISO also affects graininess on both mediums. Fast (high-ISO) films and ISO settings produce grainier, messier-looking photos, especially in darker scenes.
Slow (i.e. low) ISO numbers look much smoother, retain detail better, and are overall more pleasing to look at for most people.
Some use the grain of higher ISOs for stylistic effects, though this remains niche.
The mainstream preference across all genres of photography remains to use the lowest ISO you can afford to maximize overall image quality.
Finding Your Optimal ISO Range
Digital cameras today have incredible latitude and sensitivity that allows them to be practically noise-free even at generously high ISOs.
To really get a noise-laden photo on today’s best DSLRs and MILCs, you would have to actually try.
In many cases, that would involve extremely high ISO numbers, which are all but useless except in super-low light scenarios!
Because of this inherent advantage, plenty of contemporary street photographers like to set their default ISO to a value that would have been considered quite high in the past.
Something in the range of 400 to 800 or even slightly higher isn’t too uncommon, depending on lighting conditions.
These moderately high ISOs allow your lens to flex all its muscles while doing away with the need for longer exposures outdoors, even at smaller apertures.
A Word on Exposure Modes for Street Photography

Depending on who you ask, dabbling in exposure modes can either make your life a lot easier or a lot more complicated.
While there are many strong proponents of pure manual mode out there like me, there is also a huge base of photogs who prefer aperture priority mode.
The rationale is that mode A allows you to concentrate purely on creating the right depth of field while ignoring the often less important shutter speed control.
Yet again, others would rather go with Program automation for the minimum in fuss and the maximum in speed. Many cameras nowadays allow you to instantly override Program settings, giving you a measure of manual control in an automatic mode. Because of this, plenty see it as the best of both worlds.
Ultimately, shooting modes are a matter of preference, and none of them will make you an inherently better photographer.
The best you can do is practice shooting in each of them and see which you like best!
Achieving Perfect Focus
Capturing genuinely interesting moments candidly in the street is no easy feat, especially when you have to deal with fast moving subjects.
A big part of this fundamental problem rests with the issue of bringing subjects into focus.
Nowadays, there are plenty of methods we can use to focus. The sheer number of them might overwhelm some beginners, which is exactly what the following section will try to remedy.
Let’s take a look at the most crucial ones to determine which is right for your needs!
Traditional Manual Focusing For Shooting Street Photography

As the most basic strategy and the first one that many photographers learn to use, manual focus is a no-brainer. Just show up, twist that lens barrel, and learn to do it quickly and with precision. Easy, right?
I imagine you can already tell where problems would start cropping up. Even if you use some of the other recommended camera settings for street photography from this guide, “pure” manual focusing can be a gamble in real-life situations.
In other words, if you rely purely on the speed of your fingers for your shots, plenty of them will turn out duds.
Even the old guard of street photography from Cartier-Bresson’s time realized this, and they came up with a unique method that doesn’t require any automation but works much better than “normal” manual mode. Some would say it even eclipses auto focus in usability by a good margin. Sounds intriguing?
A Short Intro to Zone Focusing
The wonder method I just mentioned is called zone focusing, also known as scale focus.
Zone focusing explicitly makes use of the properties of small apertures that we talked about earlier. When you set your camera’s lens to an aperture like f/11 or smaller, the depth of field is going to be huge on any sensor of 35mm size or smaller.
You can use this to your advantage by deliberately setting a focus zone, or a region where you would like subjects to be in focus.
You can then just lie low and wait for subjects to enter your zone. Once they do, you can inconspicuously trigger the shutter without having to use the viewfinder or change any of your camera settings beforehand!
Using the Depth of Field Scale

Most cameras and lenses made during the pre-autofocus era, as well as a few modern counterparts will offer an engraved DOF scale or a depth-of-field calculator. You can use either of these to determine the size of your focus field for each setting of aperture and focus distance.
Using a DOF scale of the type most common on interchangeable-lens cameras is easy. First, set your desired focal distance. A look at the scale will reveal pairs of lines marked with aperture f-stops, mirrored around a central marker. The marker points to your selected focus distance.
The lines describe the minimum and maximum distance at which sharp focus can be achieved depending on the aperture. As you can tell, the benefits of a small aperture in terms of increasing the focus zone are immense.
Knowing how to read a DOF scale is not just useful for bringing as much of your scene into focus as possible. You can also deliberately set a small focus zone and still land perfectly-exposed shots using this method as long as you have a good sense of guessing distances by eye.
Limitations
Zone focus might seem like a very powerful street photography tool, and it is.
However, there are a few pitfalls you should be aware of.
Most crucially, it becomes increasingly more and more difficult to achieve focus the closer your subject gets. This is because the depth of field drastically increases with distance.
So, if you set your focus to 1 meter and misjudge the distance to your subject by half a meter, you might be surprised by the blurry results!
On the other hand, at a focal distance of 10 meters combined with a small aperture, even snapping a subject that is 3 meters closer or farther away won’t make a difference.
That’s the power of focus zones!
As will all techniques like this, zone focus is best learned through lots and lots of consistent practice. Try it out and see where it goes!
Auto Focus for Correct Exposure

Auto focus promises to make all these primitive methods and hard-to-learn skills obsolete with sheer automation.
Like zone focus, it is possible to use AF modes to shoot without ever having to lift the camera up to your face to judge distances or depth of field in the viewfinder. That can be a significant advantage, for sure!
However, auto focus also comes with its own drawbacks.
First of all, it uses power, and if you rely on auto focus for all or most of your shots, you are going to exhaust your battery much more quickly. Many street photographers prefer carrying a small outfit with them to remain incognito, so packing a lot of spare batteries and charges is not ideal.
Secondly, auto focus is not silent. While recent innovations have done a lot to mitigate this issue, we will probably never get to a point where focusing automatically is as whisper-quiet as manual mode, let alone the complete stealth of using zone focus.
Again, this can blow your cover and hurt the candid nature of street photography.
Familiarizing Yourself with AF Usage
If you do decide to employ AF in your work, know that it is not nearly as “fire-and-forget” as some make it seem! There is a ton of technique and skill that goes into using automatic focus correctly, more than this short guide could explain.
But to get you off to a good start, treat AF in street photography similarly to zone focusing. Choose a zone right away by setting your aperture appropriately.
If your aperture is very large, the auto focus might “hunt” for a while before settling on a good target. Just as before, it helps to create a large DOF!
Select AF-C (continuous autofocus) if you don’t want to lose track of moving subjects or AF-S (single AF) if you want to minimize noise.
Finally, use your camera settings to select a focus area.
Most digital cameras these days let you automatically focus on a field slightly right or left of center, for one. At the same time, they will allow you to adjust how much of the scene is metered and focused on, ranging from a single point to a wide area.
That can be a real lifesaver for when you don’t want to scare off potential subjects by pointing your lens right at them.
The Best Focal Length Settings for Street Photographers

If you thought focal length didn’t have much to do with the topic of today’s guide, think again.
In fact, every major factor affecting your exposure is dependent on your focal length!
Because of this, many famous photographers active in the street photography genre advocate for the use of one prime lens at all times. While it’s true that this approach makes learning a lot easier, it’s not necessary if you understand how focal length affects your exposures.
The first rule of focal length is that the depth of field gets thinner with increases in focal length. In other words, telephoto lenses require you to “aim” your focus with a lot more precision.
What’s more, longer lenses also produce more camera shake and motion blur.
There is a simple formula that can help you remember this correlation: Calculate 1 divided by your focal length.
That is the slowest shutter speed at which you can avoid excessive shaking when shooting hand-held.
Remember that while the same focal length will turn out photos with different fields of view on different sensor sizes, this formula is always the same no matter what camera you attach your lens to.
In the end, it is easy to see why most flock to lenses with focal lengths between 20 and 50mm.
35mm primes are commonly cited as the ultimate sweet spot for the street, but it’s a matter of personal preference.
Experiment with lenses of every kind of focal length to find out what suits you best!
Praxis: Putting Your Learned Skills To Use When It Counts

Let me tell you a little story about the importance of getting your street photography camera settings right when it counts.
Coming Across the Perfect Moment
Last winter, I went on a walk with a loaned camera I had never handled before. It was an Olympus C-750 superzoom from 2003, a real time capsule from a forgotten period in photographic history.
By today’s standards, this is an absolutely obsolete and primitive example of a digital camera, and nothing like what I am used to.
I was still trying to acquaint myself with how the Olympus worked when this scene just happened to materialize in front of my eyes.
I had about two seconds to compose and expose through the cramped electronic viewfinder, and I did my best.
Camera Settings
The focus was set to infinity, and I left it there for simplicity. On a camera with a large sensor, this might have come back to bite me, but the CCD of the Olympus is so tiny that your depth of field is almost always infinite.
I wanted a slow shutter speed to accentuate the movement in this scene, but the camera had already been set to aperture priority mode, and I knew that switching back to manual mode would make me miss the shot.
Hence, I relied on the Olympus’ suggestion of 1/10th of a second.
Because I was shooting at 10mm, this was right at the edge of what still allows for minimal camera shake.
Results
Now, after all that, did I get a shot that’s ready for display at a fine art gallery, or that will land me six-figure contracts with VIP clients? Probably not.
With a whole 3 megapixels at my disposal, resolution is, let’s say shabby. There is also a lot of noise by today’s standards, and quite a bit of camera shake-induced blur around the edges.
And look at all those optical artifacts!
The slow shutter speed could have looked much better had I had access to a tripod.
A much larger sensor would have worked wonders in terms of overall image fidelity, and for what it’s worth, I would have really liked to go even slower than I did.
Around 1/2 of a second would have probably looked stunning with this scene, I imagine.
Embracing Spontaneity in Street Photography
But that should really be the keyword here: I imagine.
That perfect shot, where I showed up prepared ahead of time with a stabilized, full-frame camera and a faster lens, focused in on the walking lady’s boots with laser precision, and managed to produce a technically flawless rendition of the same scene above? Well, it just wasn’t going to happen.
It is a very rare moment indeed that a subject just drops into your lap at the perfect moment. When all the planets align, and all you need to do is to frame and trip the shutter, you should thank your luck.
More often, you will have to get used to making “less-than-perfect” shots where reacting intuitively to the decisive moment is much more important than fine-tuning.
If I had spent those two seconds complaining about the restrictions and limitations of the Olympus, I would have never produced what is now one of my favorite shots, flaws and all!
Let that sink in as another fundamental lesson about the importance of holistic, not merely technical skill alone.
The Bottom Line

You should now have a solid fundamental understanding of the most important camera settings to know in street photography. But your journey is far from over!
Mastering these techniques can take a long time, much longer than it takes to understand them on a principal level.
And then there are the countless stylistic and other elements that we don’t even have the time to feature today, such as color balance, use of perspective, and the differences between different kinds of sensors and film types. And don’t even get me started on development and post-processing!
The point of this final note isn’t to discourage or humble you – if anything, it’s the opposite!
With what you have learned today, you are more than ready to take on the challenge of street photography and find your own way through experimentation and practice.
Good luck, and don’t forget to have fun!


Good Stuff Jonathan!
Robert Knapp
Portland Wedding Photographer